In my family, we used to use Google Drive to make sure that all our photos taken with our smartphones are safe even if we chose to smash our smartphones in the most inconvenient way ever. It is hassle-free and affordable. But eventually, it got me thinking: There are servers running 24/7 in the cloud just to make gigabytes of pictures available that are only there so that once a year my wife can make a photobook of the highlights. Surely that does not sound right. Especially with CO2 cloud storage footprint estimations between 200kg CO2 and 500kg CO2 per Terabyte per year. With an HDD clocking in with ~200kg CO2, even getting a new harddrive as extra storage is worth the effort.
The last 2 points are simply safeguards against accidental deletion.
Enter Syncthing: Syncthing is a continuous file synchronization software. So it can sync folders across all kinds of devices (PC, phone) and OS (MacOS, Windows, Linux, Android,…). And it does not care whether devices are sometimes offline or switched off. And it is open source. And it is easy to use. And it just works (for everything but iPhone photos apparently). With the following guidance, the whole setup takes less than 20 minutes.
After the installation you can open a gui via app (on smartphones) or in the browser of the devices with the adress “127.0.0.1:8384”. You can make the ui available through the computers ip also, but this is switched off as default for security reasons.
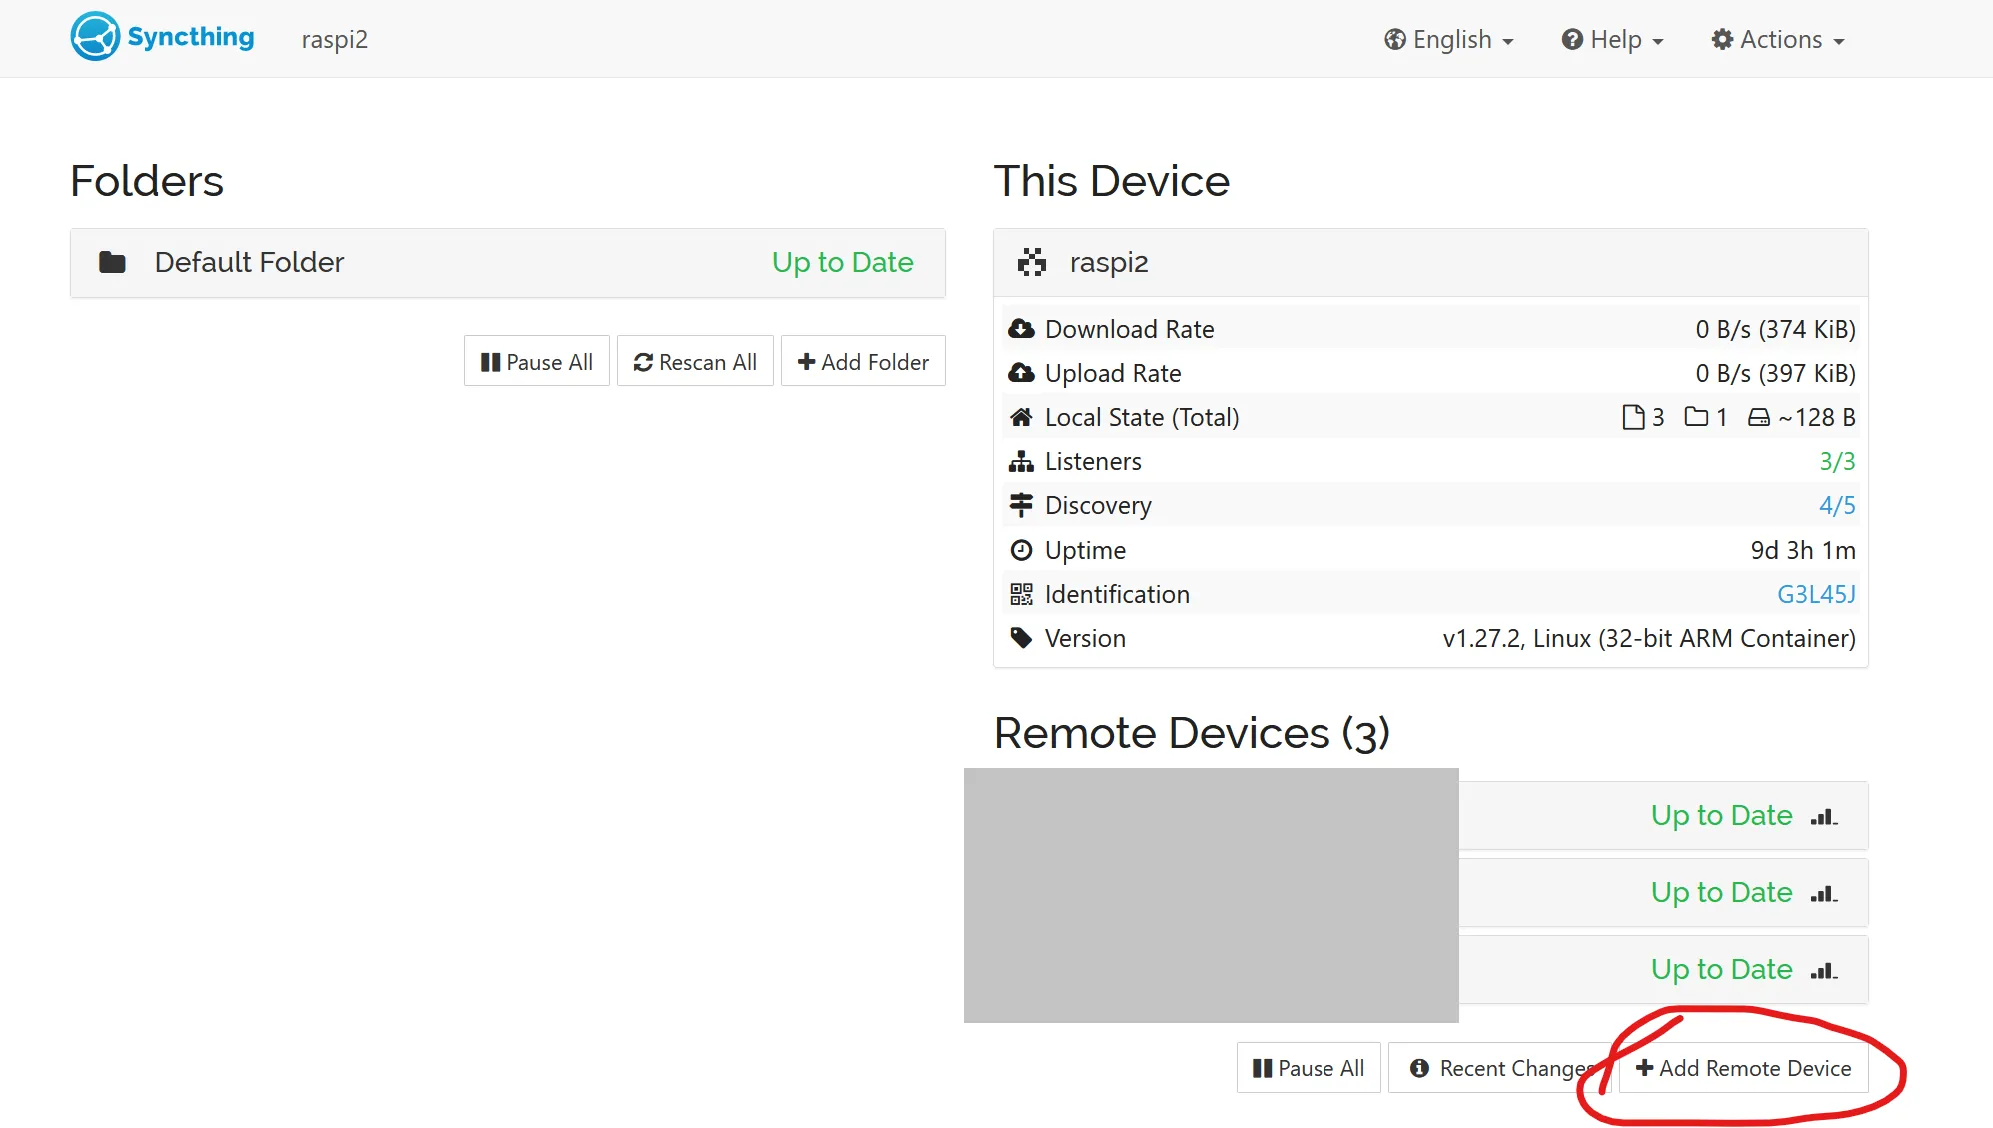
There you can add your new devices. Usually, the devices with syncthing in the same network are suggested for connection.
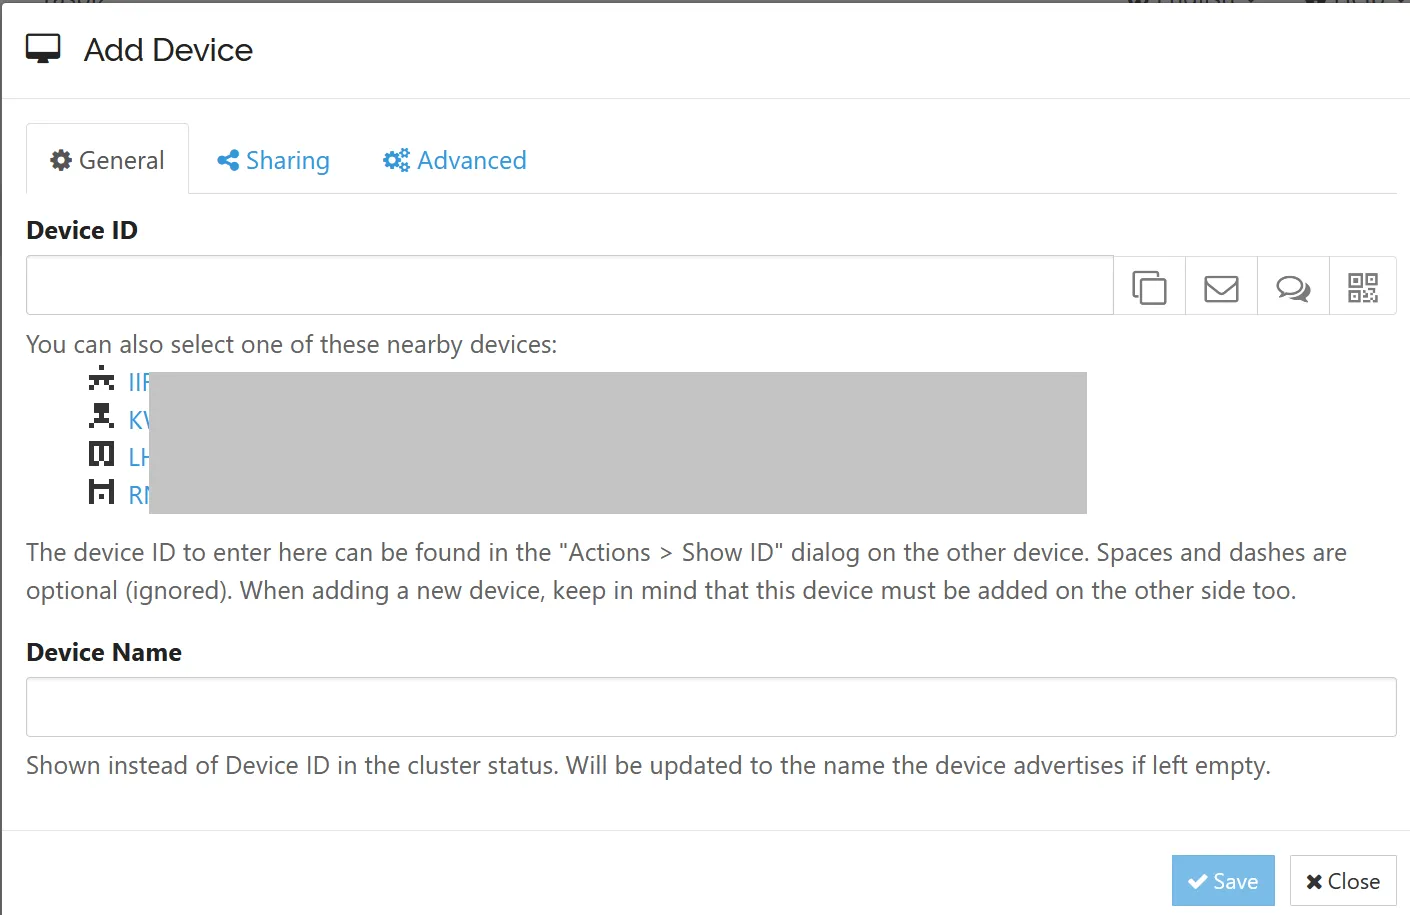 After saving the new device, you need to confirm the device registration in the device itself. A confirmation message pops up in the device (sometimes you need to reload the web ui for the message to pop up).
Once your device is connected, you can set up the syncing of folders by using the “+Add folder” button.
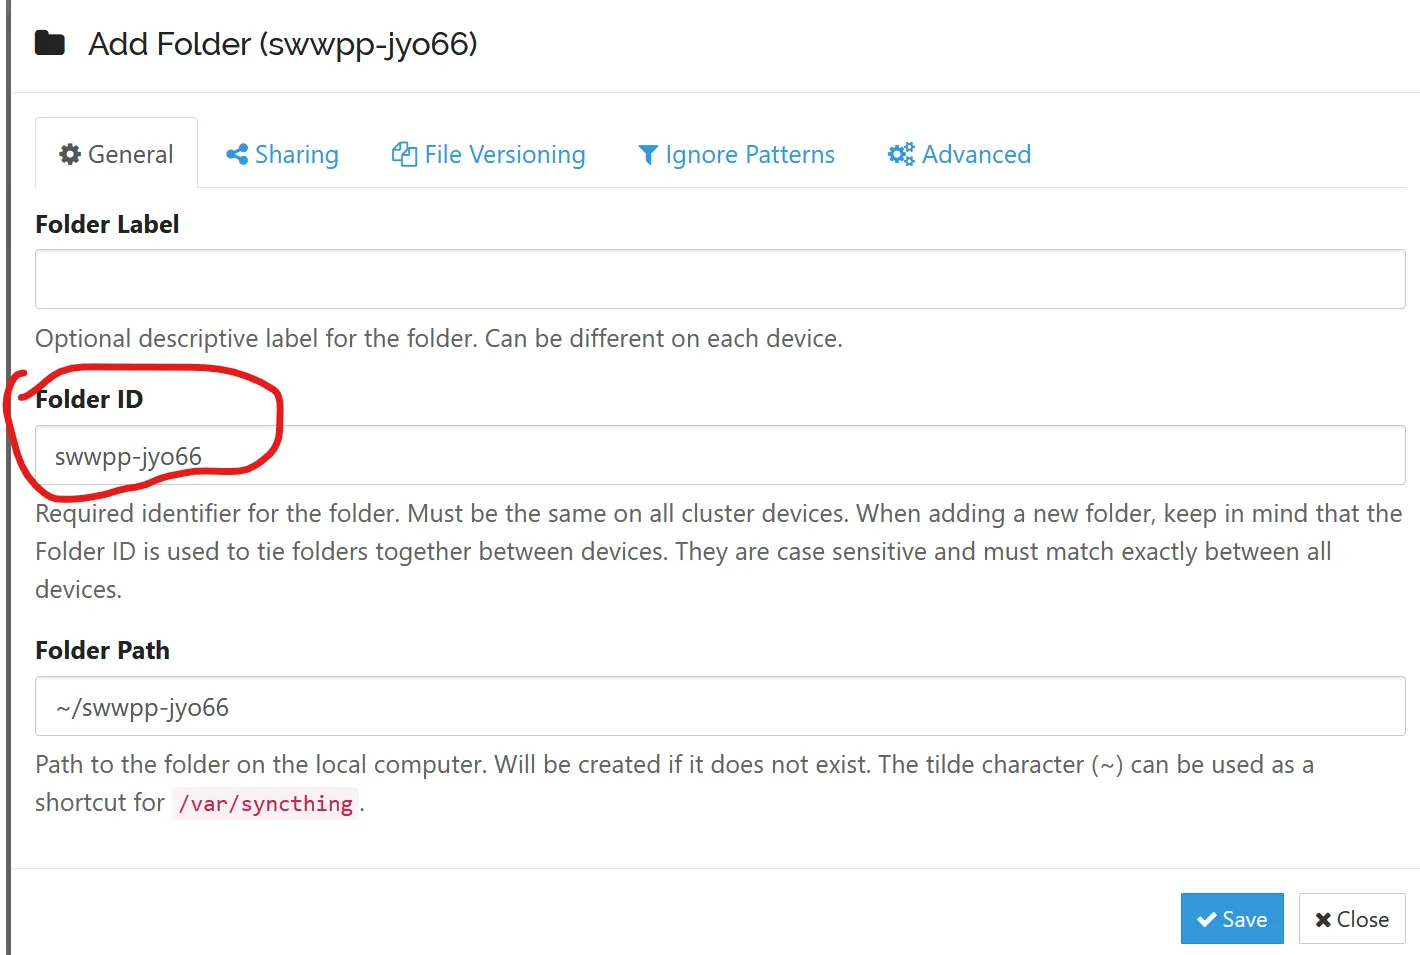 In this form, the only important field is the Folder ID. Folders on different devices are linked by a shared folder ID. This means that a folder named ./DCIM on the smartphone can by synced to a folder named ./myfotos on another device as long the Folder ID in both folders are the same.
Harden against accidental deletion.
In order to make sure that we only add to our backup and never delete data; on the sending device, we set the folder to only “Send Only”.
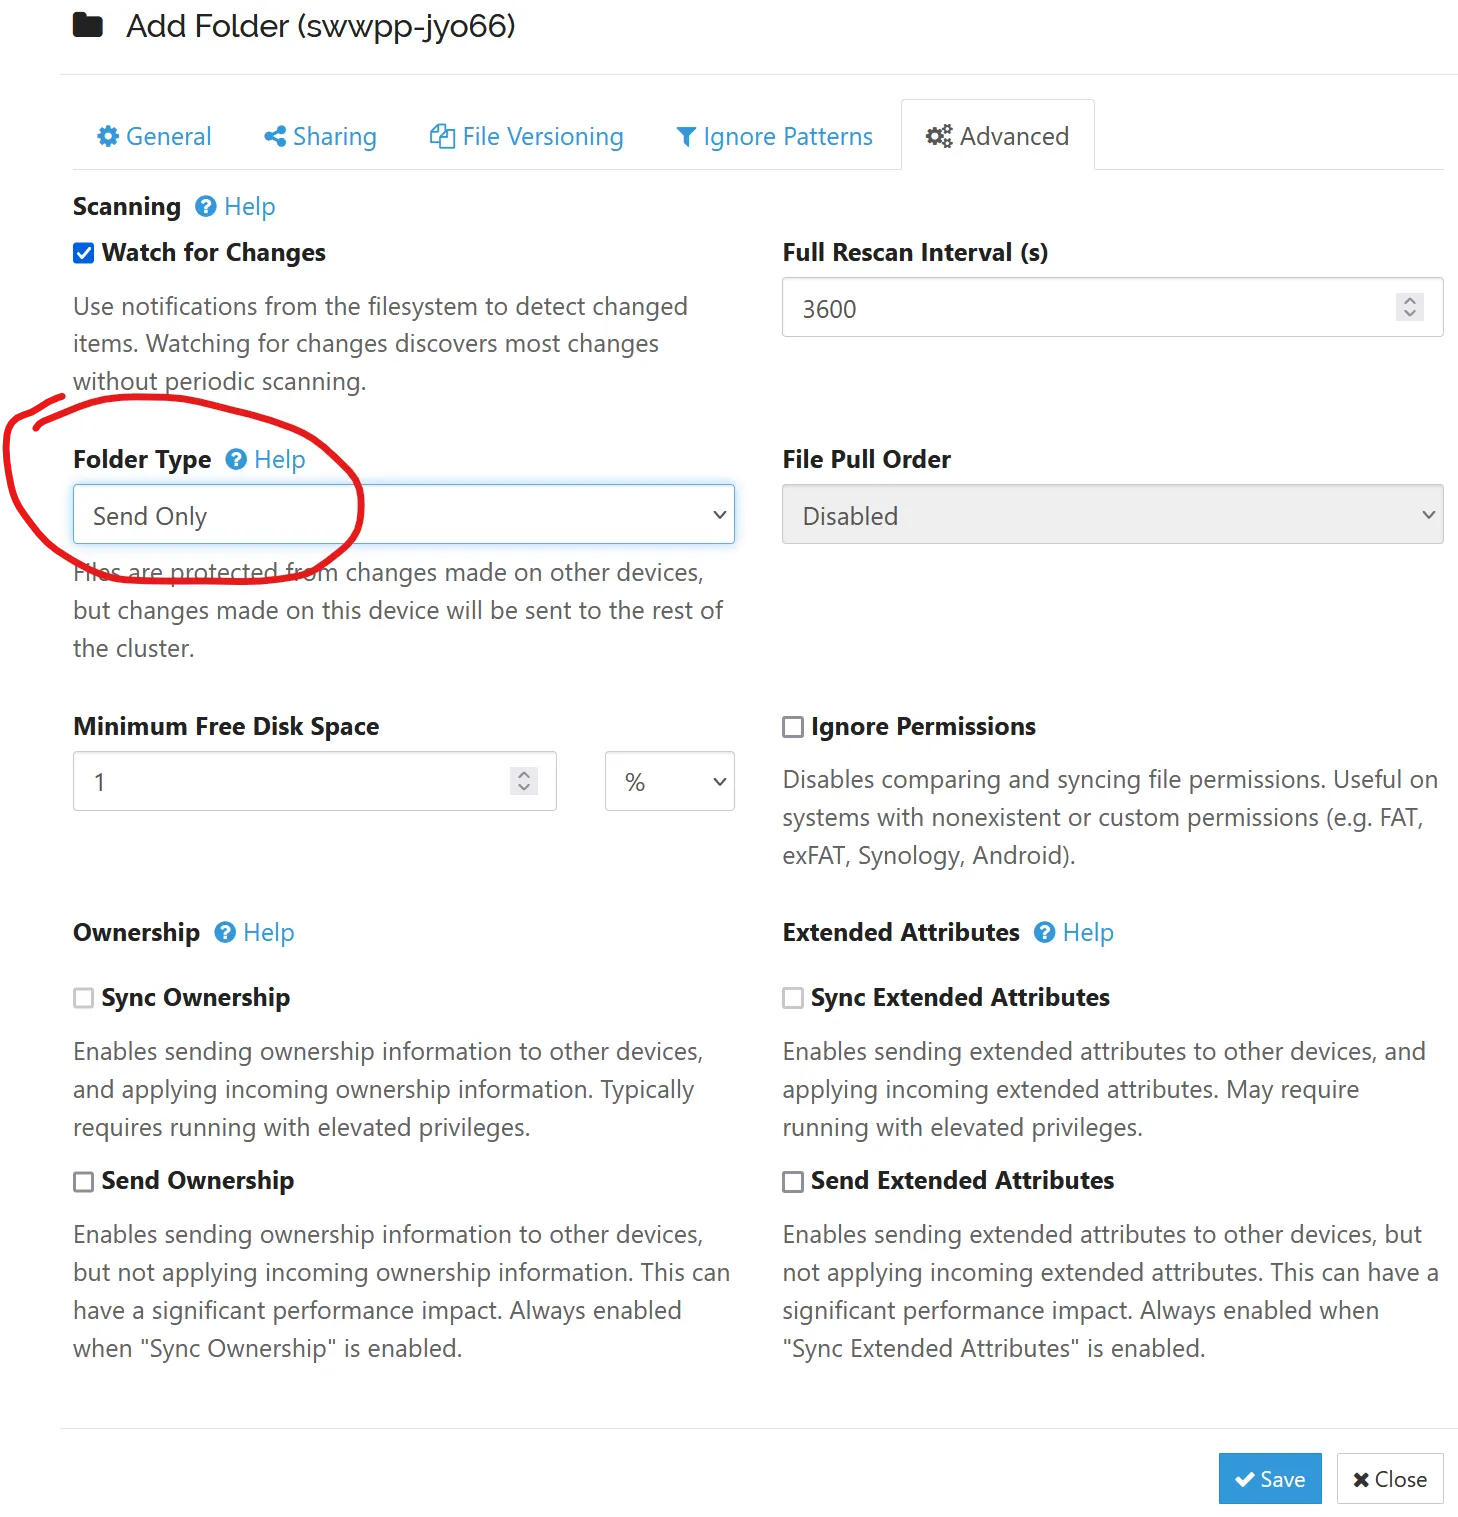 .
On the backup server we need to set this setting to “Receive Only”.
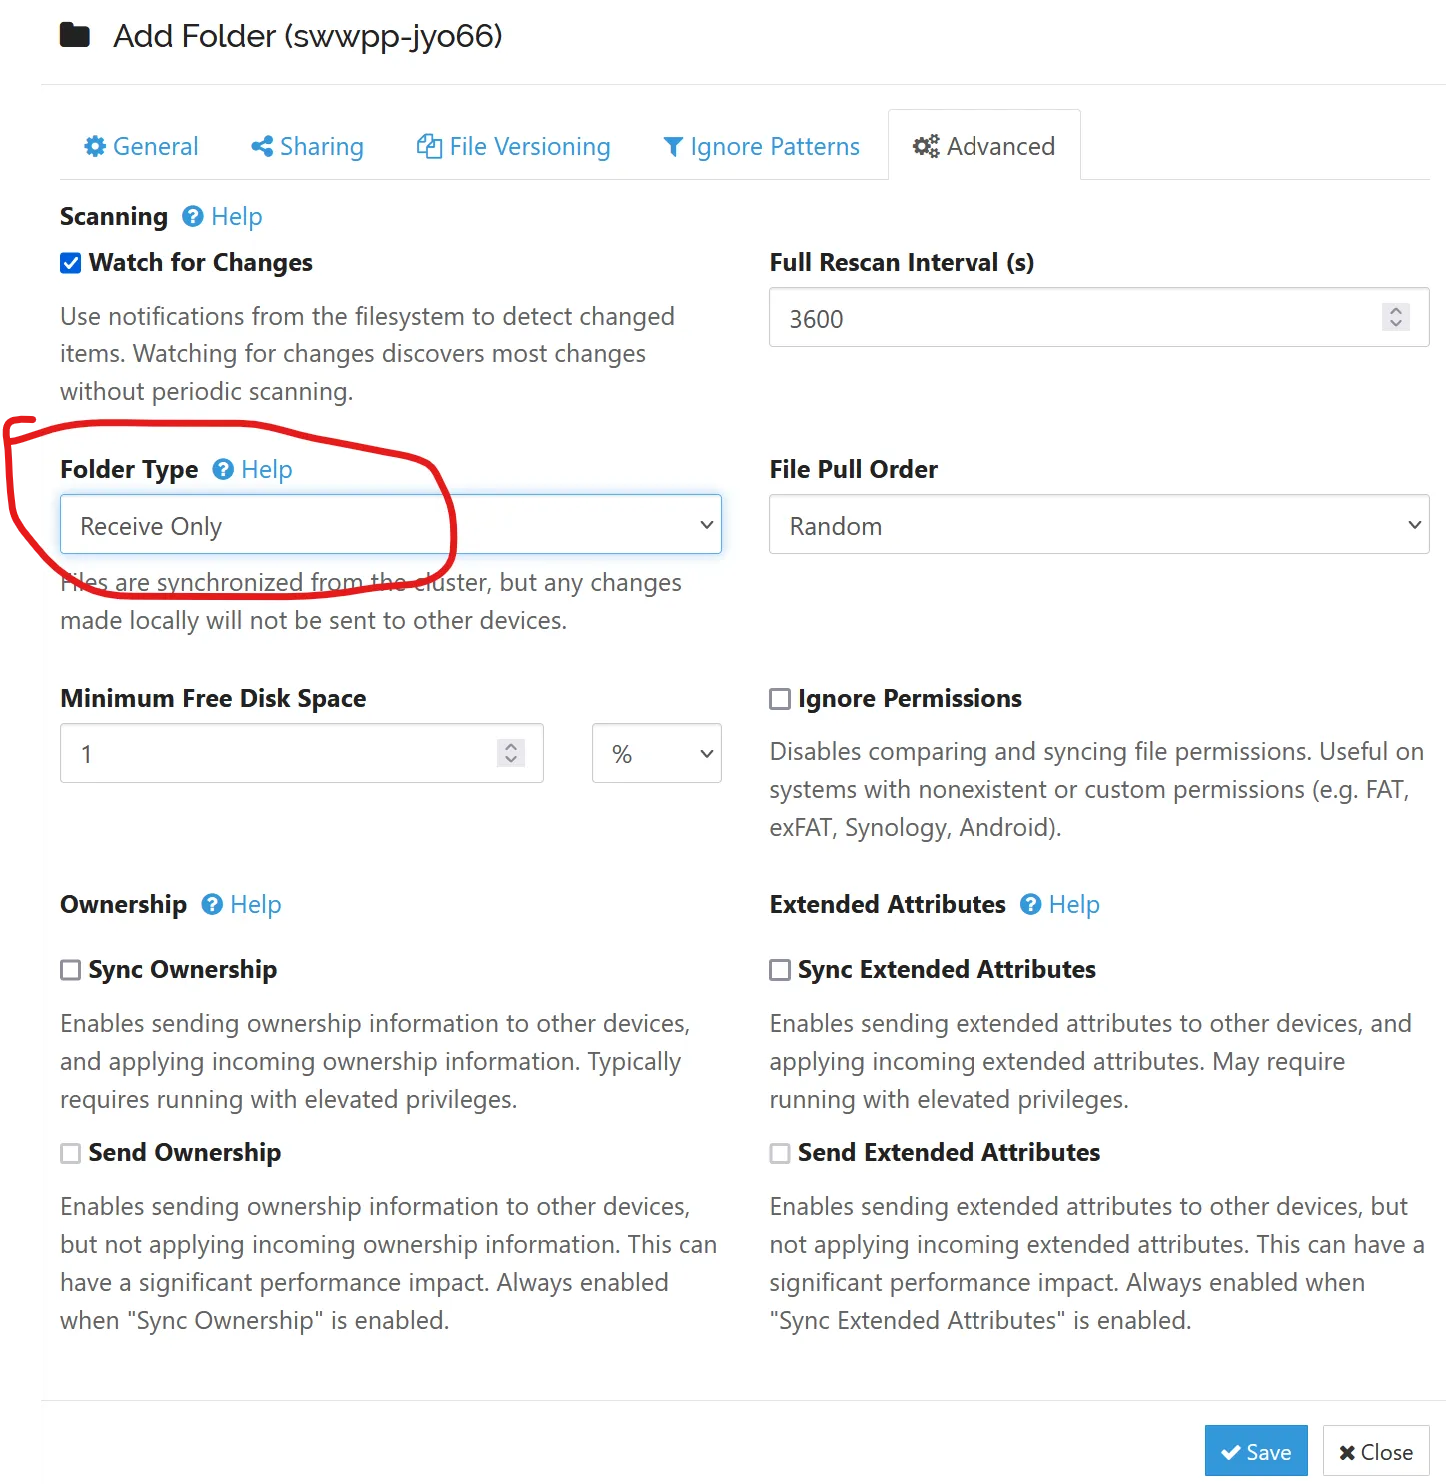 Finally, in order to prevent the sending device to send deletion requests to the backup server, we need to make an “Advanced Setting” on the backup folder.
 .
There go to “Folders” an select the folder. Here, activate the “Ignore Delete” checkbox.
 .
.
Activation of syncing
Finally, the syncing process can be activated for sharing in the “Sharing” Tab of the folder.
 .
After the sharing activation, as last step you need to confirm the sharing in the popup message of the respective device.
Now you can see the dataflow and syncing status on either of the shared devices.
Off course, data back-ups do not end here. To only backup all your data to a single computer might not be the best strategy as soon as this computer fails. In my case I have a secondary backup process in place that used to backup data from my cloud data, which is now using the local backup instead. So I really do not feel like I lost backup reliability there, while reducing my footprint.
If you like Syncthing, don’t forget to donate to them!